When I posted my ‘I’m overwhelmed’ post, one of the items was ‘prep for the purse class’. This was it…
I wanted to add sashiko all over but ran out of time. That was what I needed to do to prep. I got it started and had to settle for the little bit of sashiko I got in before my class.
This little purse is so cute. I love it. And it only takes a little bit of fabric. I’m considering making a bunch for our next boutique.
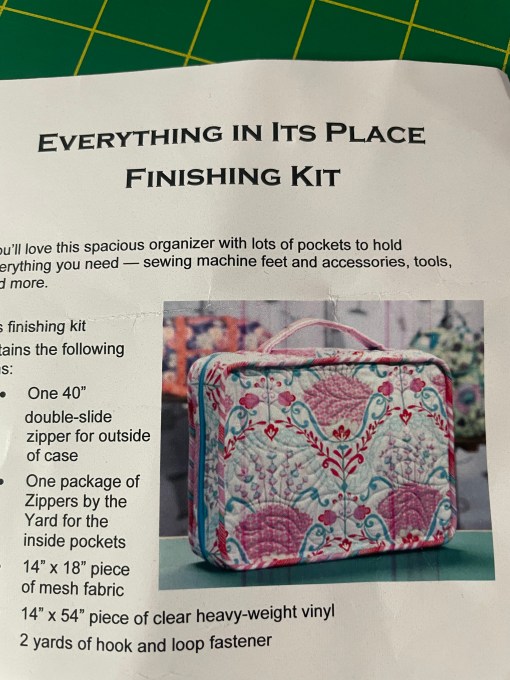
On my January list of things I wanted to get done, this bag is #7. I’ve written about wanting to make bags almost since the very beginning of this blog. And some years I make some and a lot of years I do not. But this bag kit was purchased with a Craftsy class many years ago when I was into Craftsy classes. Unfortunately, I was overwhelmed by the complexity of this project and I let it go many years. I kept the kit together and harbored hope that one day I would be able to do it. During the pandemic a group of us ladies met on zoom a lot and out of those meetings bag making was discussed. Not everyone wanted to venture into it but some did and some were already well into it. We created a Friday night group called The Bag Ladies. In the beginning, it was supposed to be once a month. But it quickly increased to every Friday. Slowly, as time went on and the world opened up more we found ourselves meeting less and less and we disbanded the group.
However I had started this project and it was beyond my bag making skills. The project itself is difficult but I also had to look for all the parts to the kit and luckily, I was able to gather them all together. I worked on this a bunch in 2021 and then put it aside when life got busy. That’s the worse thing to do with a project as complex as this. Its already a hard bag just by itself. but when I put it aside and then have to remember where I left off, what I did and what I still needed to do just made it all the more difficult. Since this is number 7 in my list I made it a mission to not start #8 until this project is done!
Here are some progress pics of the pages I put together.
pockets with style 1 on the left and style 2 on the right. the difference is that 1 is one big pocket on top of another with one zipper. while 2 has two side by side pockets and 2 zippers. pockets with style 3 on the left and style 4 on the right. it’s pretty much the same as 1 and 2 respectively except that there are three sets instead of two.
And once those were done I added velcro to each side.
I’m really thrilled with how it’s coming along. and while it is difficult, my machine is handling things like a pro and as long as I take each step one by one and watch the craftsy class while I’m doing it I am finding I’m able to do it.
bound
I find bag making takes a lot of focus and I couldn’t do this bag and meet up with the bag ladies. I needed to focus and concentrate which are two things I am unable to do while my friends and I are on zoom chatting.
This is the outside part with one of the sides connected to the outer zipper.
I found it hard to do the binding on this end. It’s done but I don’t like how it turned out. I took the raw edges together and with the side at the bottom machine bound the raw edges of the binding to the raw edges of bag smooshing all the layers as much as possible with my stiletto. That part was easy but I had to pay attention and not make my quarter inch too big by mistake, especially around the corners which I tend to cut through too quickly. The part that was hard was doing the other side. I was able to pull the binding over and it covered everything nicely but if I sewed it on that end we would be able to see the stitching on the other side. I didn’t want that. So I stitched in the ditch on the already sewn side and hoped it caught the binding to secure it on the other side. It did mostly and where it did not I just resewed from this side. It worked but where I was blindly securing it didn’t line up always right and so it looks wonky. If you look closely at the picture above you can see how the bottom binding has more pulled over than on the other parts.
There must be some trick to it that I’m not aware of. Well that side is done now and I’m not picking out. But hopefully I will learn a better way to do these bindings in the future.
I believe I started this project sometime in 2017. I was taking all the bag making classes at my LQS and this was one of a series…
I love the fabric but I’m not too thrilled with the finish. I made the medium size and the lid is way too big for the basket which is why it’s underneath. The problem was entirely my fault and due to the long length of time between when I started it and when I finished it. There were things I forgot and just did and that caused my basket to get sewn up smaller than it should have been. It’s ok. I am not planning on making this again.
I didn’t realize that I started this bag in 2017. I know because I looked for the post I wrote about this when I took the class. All I had left was to put the handles through the purple things, whip stitch them, and that’s it. They were done. It did take me longer than I thought and it was harder than I thought it would be. But it’s done. I do not know what I’m going to use it for but it’s so cute. And I want to make another one. Not right now. 😉
It’s so nice to craft with other crafters once in a while. Yesterday, I went to a UFO party and took a number of older projects with me.
First, I tackled this …
untitled 2/3/2018
I don’t even have a name for this project. When I still had my mid-arm I was practicing on this. I simply slapped two pieces of one yard fabric that I liked (with batting in the middle) and quilted it with the mid-arm. I can’t remember exactly but I think it was this piece that told me I had a problem with the frame and the machine. Anyway, I don’t have the mid-arm anymore and this piece was just laying around waiting for me to trim and bind it. At the UFO party last night, I trimmed it and got the binding on one side of the quilt. I plan on getting the other side done pretty soon. I don’t know what I’ll be doing with this quilt yet but I think it will be waiting for the right recipient.
The second project I tackled was this:
an old pillowcase 2/3/18
Many years ago, (around 10), I made and gave away pillowcases for Christmas. I had a handful at the end of it that I never finished. I probably had 2-3 cut and ready to be pieced. Those have since made their way into other projects or into my scrap stash. This particular piece was all pieced together except for the final french seam. I just never got back to it and it sat around since then. I pulled it out one of the times I organized my stash recently and it was in my UFO bag. Today it is finished! woohoo!
And finally, my third project:
The Maxwell Bag handle 2/3/18
This is one handle for my Maxwell Bag. I finally finished sewing the fabric together on the handle. Here’s how the Maxwell Bag currently looks:
Now that the handles are done, I can continue with the finishing steps.
It was a fun and productive night. I hope to do it again and in the meantime, I will go through and pull out some old UFOs to work on at the next party.
This weekend is a chock full of classes. This month is a chock full of classes. First a few months ago I signed up for my quilt guild’s September workshop on embellishments. I signed up soon after the quilt show and was highly motivated to take classes on any hand work I could get my hands on. That class is tomorrow and I’m still very excited to take it, I just wish I didn’t have two classes this weekend.
The second class is the monthly bag class I’ve been taking. When I took the August bag class the September class had not yet been scheduled but that soon changed. My calendar on my bujo is Sunday through Saturday so when the class was scheduled for 9/9, I immediately signed up. I didn’t realize that my other class was the following Sunday. Oh well. Even if I had known, I would have signed up for the bag class anyway. I’m really enjoying the classes. I just wish I had time to do more bags outside of the class to fully learn the techniques.
And I have a third class scheduled for next Saturday, the 16th. I can’t remember exactly what I signed up for but I believe it’s on the same lines as hand work and embellishments. These are the things that interest me lately and the techniques I want to learn, practice and develop.
On a side note, my secret project is bound and the next step is to label and wash it. I’ll add that to my to do list for this coming week. Since it’s a secret I can’t post pictures until some future date. Sorry!
I was able to snag a picture with somewhat better lighting. And I do not know why I’ve never done this before but watched some cross stitch tutorials on you tube. I just had it on auto play. This morning I realized that I watched all my regular podcasts/vlogs and was looking for something new. Since I picked up my long term cross stitch project, Mama’s Bukid, I searched out cross stitch videos. I’ve said this in past posts but in case you didn’t know, I learned to cross stitch in the 90’s with my grandma and I’m working through the crush of projects she and my mother purchased for me. So my projects are dated and I never explored further than what my grandma taught me. It didn’t even cross my mind. Except that I’ve been watching a lot of podcasts lately and a number of them have mentioned cross stitching and some interesting ideas like starting, finishing, etc. So while I was cross stitching I started watching. I plan to integrate some of the new to me techniques to see if I like them and will let you know what I find. In the meantime, here’s my current progress and it looks like the images in the sky of the bukid are changing. It is exciting to see. Somewhere I lost the picture that came with this project so it’s a mystery to us. I know I liked it. I know my mom picked this out. I hope we still like it when it is finished. ;0
This last week my hubby’s uncle passed away. The family is still recovering from the sudden passing of my brother-in-law so it’s really sad and heartbreaking to have this happen as well. My heart goes out to my MIL and my cousin-in-laws and all the family over there. Unfortunately, my hubby will not be able to make the trip back to the Philippines again as there’s just no money for a second trip and he’s not able to take the time off work again. This last week was just his 2nd week back after almost 1 month off. We will do what we can from here.
On a happier note, I took a bag class at my LQS. It was for the Maxwell Bag by Abbey Lane. The picture above is the picture of the bag on the pattern. Here is picture of my bag still in progress:
The outer and inner parts put together
I’ll have to post about it separately as there is just too much to talk about… It was supposed to be 2 evening sessions but it looks like we’re trying to get a 3rd evening thrown in so we can finish the bag. I hope that happens soon.
Happy Memorial Day weekend! I’m very excited to have a long weekend and enjoy the time crafting. Tonight the hubby and I plan to join friends at a JoKoy comedy show. It’s the first time we’re watching one of his shows. We’ve seen him on an Adam Carolla show in Vegas one year but never on his own. I’m excited to be doing something different. Other than that, I’ll be crafting all weekend.
I’ve been knitting more these last few months just because it’s easier to grab and take around with me. So I’ve been using Ravelry more and more.
It got me thinking – is there a Ravelry for quilting?
Let me know! I’d love to try it out.
In the meantime, I made a project bag
Another Project Bag 4/22/17
My husband and MIL took off to the Philippines last Thursday because my Brother-In-Law passed away suddenly. I gave them all the bags I’d made so far for them to give away as they saw fit. It’s a great feeling. Now I need to make more bags to put my projects into. 🙂 Anyway, here is the latest one. I’ve still got a ton of that fabric (the floral one). It’s like a home dec fabric and it works great for making bags with substance. I’m trying different stitches on my machine because I want the stitch definition at the top of the bag to be more defined. I am using 28W Aurifil to help with that. This is why I buy thread. I stopped just buying thread because I want to use what I got but I think I want to try the 12W or thicker. I don’t know if I have that already in black. I want the stitches to stand out on top of the fabric. With the 50W it sinks into the fabric and gets lost. I like it how the 28W looks better than the 50W but it’s not quite where I want it. So I’ll try the 12W next. I need to play with more stitches on my machine too because I might just find something that works with a different stitch.
I am also using parachute cords because it helps with drawing the bag open and closed. I like it! I was using fabric at first but it was difficult to open and close the bag. I also discovered that you have to burn the ends so that they don’t fray. Last weekend I burnt the ends but I didn’t burn them enough and it looked weird. Here’s how they look this weekend. I like them better but, boy, do they stink!
I’m going to try to get around to some quilting today too. With the hubby out of town for a few weeks, I hope to get some serious crafting done.
It’s been a couple of months but I can finally show the secret project I was working on earlier this year. I’ve already included it in the stash report so I can’t include it now. But I realized last night that I hadn’t showed it yet so decided to do so this morning.
Here’s the back! It’s so soft and fuzzy!
If you’ve read any of my monthly goals for the last few months, you might remember that I’ve had “do first project of the book Sew Practical” on that list. I finally now have done it.
4/24/15 Project #1 of the Sew Practical book
Woohoo! Check my blog post from Friday to see the full details. If you do check that post out, I do want to mention that the instructions do say to use a 1/2″ seam. I just didn’t see it while I was putting the bag together. 🙁 Now that I’m actually making bags I’m starting to gather a bunch of them and I’m not sure what I’m going to do with them all. I don’t need them all. They are really just practice so that I can get into the cooler bags that I see floating around the interweb. I may just give them away somehow. Next month Project #2 rises up to my monthly to do list and this time it is a knitting bag. Because of the finished bag, I have used 2 yards and I have added nothing this week! woohoo! 🙂
Used this week: 2 yards
Used year to Date: -28.75 yards
Added this week: 0 yards
Added Year to Date: 35.75 yards
Net Added for 2015: 7 yards
Quilty $$ –
Spent this week: $0
Spent Year to date (beg 4/12/15): $45
What I want to concentrate on next week:
With Bernina in the shop, I’m working on the featherweight. I’m taking this time to let it run since I haven’t used it since I first got it. I’m going to work on the April clue for Scrapitude this week.